Translate

samedi 28 octobre 2017

Watch Out for Bad Gasoline

Adapted from an article written by Larry Carley that appeared in Underhood Service magazine Gasoline quality is an issue few people think about. When hurricane Katrina hit in the summer of 2005, gasoline prices soared. Everyone was scrambling to buy the cheapest gas they could find, and the sales volume of premium and mid-range gasoline dropped. They said there was a serious fuel shortage, so refiners who were normally required to make reformulated gasoline (lower emissions) were temporarily allowed to cut some corners so they could produce more gallons of gasoline from each barrel of crude oil. Consequently, there was an unpublicized drop in both fuel quality and octane rating during this period. We also suspect that some oil companies (but not all) also used this opportunity to cut back their use of detergents and deposit control additives in their gasoline.


When the crisis had passed, gasoline prices came back down, the panic passed, and the sales volume of premium and mid-range gasolines went back up. Since then, gas prices have climbed back up to to over $3 a gallon -- but there is no hurricane to blame this time.


As far as we know, a couple of months of over-priced, sub-par gasoline during the so-called Katrina "crisis" did not cause many noticeable problems with engine performance. Thanks to the knock sensor, most engines (even those with higher compression ratios) can usually tolerate some deviation in the octane rating of the fuel -- at least for short periods of time. Today, we continue to hear complaints about driveability issues that are typically caused by a build-up of varnish deposits in the fuel injectors and throttle body, and carbon deposits on the intake valves and in combustion chambers. These problems include engine knock after cold start or when the engine is working hard under load, hesitation problems when accelerating, rough idle, poor fuel economy and even misfiring (which often turns on the Malfunction Indicator Lamp). We have not found any recent studies by the government or anybody else that addresses the issue of fuel quality or whether the level of detergent and deposit control additives in gasoline is sufficient to keep today's engines clean. But we suspect that if such a study were undertaken during the aftermath of hurricane Katrina, it would have revealed widespread problems with inadequate levels of these necessary additives in some gasolines. GASOLINE DEPOSIT FORMATION When deposit control additives are not adequate in gasoline, harmful deposits can build up inside the engine: * Fuel varnish deposits that form inside the injectors restrict fuel delivery and cause the engine to run lean. This may cause lean misfire, rough idle, hesitation, poor fuel economy and increased HC emissions. A lean fuel mixture also increases the risk of detonation and preignition. These deposits tend to form during the heat soak period that occurs after the engine is shut off. The shorter the trips and the more frequent the drive cycles, the faster these deposits buildup. * Deposits that form in the throttle body can reduce airflow through the idle bypass circuit affecting idle quality and smoothness. These deposits are formed by fuel vapors that rise up through the intake manifold.


Intake valve deposits from gasoline that does not contain enough detergent


* Deposits that form on the intake valves can restrict airflow through the intake ports, causing a loss of high speed power. The deposits can also act like a sponge and momentarily soak up fuel spray from the injectors. This disrupts the mixing of air and fuel causing a lean fuel condition, hesitation and reduced performance. Deposits can also cause valve sticking and valve burning. Intake valve deposits are formed by normal combustion byproducts, but may build up more rapidly if the valve guides or seals are worn and the engine is sucking oil down the guides. * Deposits that form inside the combustion chamber and on top of the pistons increases the compression ratio of the engine and the octane requirements of the fuel. Too much compression can cause spark knock (detonation) if the fuel's octane rating isn't high enough. Over time, detonation can damage the head gasket, piston rings and rod bearings if it is not controlled. The knock sensor will detect detonation and tell the PCM to retard spark timing. This will take care of the knock, but retarded timing also increases fuel consumption and emissions. A build up of carbon deposits inside the combustion chamber also increases the risk of hot spots forming that may cause engine-damaging preignition. The hot spot ignites the fuel before the spark plug fires, causing a sharp rise in combustion pressure. Under extreme conditions (high rpm and load), preignition can burn a hole right through the top of a piston! A condition known as Combustion Chamber Deposit Interference (CCDI) can also occur when the carbon deposits are so thick the deposits on the piston and head make physical contact. This area, known as the Squish Area (piston to top of chamber), has a clearance that is about as thick as a paper clip. This can cause a loud, metallic banging sound when a cold engine is first started. The deposits are soft and will gradually flake off. But the flakes may lodge between the valves and seats causing a loss of compression, misfiring and rough running when the engine is cold (a condition called Combustion Chamber Deposit Flaking or CCDF).


KEEPING FUEL INJECTORS AND COMBUSTION CHAMBERS CLEAN The formation of harmful deposits can be controlled by adding detergent-dispersants to gasoline, the most common of which is polybutene succinimide. Used with a petroleum carrier oil, detergent-dispersants help keep the intake manifold and ports clean. These chemicals are more effective than the carburetor detergents that were once used in gasoline, but they must be used at concentrations that are three to five times higher than the older carburetor detergents. Deposit control additives such as polybutene amine (PBA) were introduced in 1970 to help keep injectors and intake valves clean. The only drawback with PBA is that too much of it can increase combustion chamber deposits. Polyether amine (PEA), by comparison, cleans fuel injectors and valves, and does not increase combustion chamber deposits. In fact, it helps remove accumulated deposits inside the combustion chamber to reduce the risk of spark knock. In 1995, the U.S. Environmental Protection Agency set minimum standards for additives in gasoline to prevent the formation of deposits in fuel injectors. Gasoline refiners had to certify their additive packages met these standards, but some experts now say the original standards were set too low and do not provide adequate protection with some fuels and engines. The minimum EPA required level is referred to as the "Lowest Additive Concentration" (LAC), and is typically found in the cheapest priced gasoline. TOP TIER GASOLINE At the other end of the fuel quality spectrum are "Top Tier" gasolines. These fuels are recognized by the vehicle manufacturers as having the most effective additives and in the highest concentrations. Gasoline retailers must meet the high Top Tier standards with all their grades of gasoline (not just premium) to be designed as a Top Tier supplier. In addition, all the gasoline outlets carrying the brand of approved gasoline must also meet the same standards. Gasoline retailers who are currently on the Top Tier list include Chevron, Chevron-Canada (B.C. only), Texaco (Chevron supplied only), Conoco, Entec Stations, Esso, ExxonMobil, Kwik Trip/Kwik Star, MFA Oil Company, Phillips, QuikTrip, Road Ranger, Shell, The Somerset Refinery and 76. For a complete listing of gasoline retailers who are selling Top Tier gasoline, Click Here.


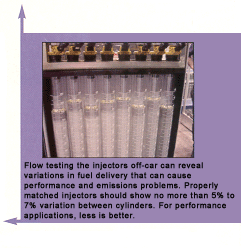
POLICING GASOLINE QUALITY Unfortunately, fuel quality isn't something that is easily policed. Many states have programs in place to monitor fuel quality on either an ongoing basis or "incident specific" basis. Most are run by the state's Department of Weights and Measures. Even so, the focus of most of these programs is to make sure consumers aren't being cheated at the pump and get the full gallon they pay for. Some programs also check fuels to make sure they do not contain too much alcohol. The specific density of gasoline can be field tested to determine its volatility and alcohol content. But testing octane and the amount and type of additives in the fuel requires expensive laboratory testing. So this type of quality testing is rarely done. According to one leading gasoline retailer (who sells a Tier One fuel, by the way), many gasoline marketers have reduced the concentration of fuel additives in their fuel up to 50% in recent years! Most gasoline refiners don't want to sell the public bad gas because they obviously want repeat customers. Even so, they also know that deposit formation is a gradual thing that occurs over time. So if they cut back on the additive package to save a few cents per gallon, nobody is the wiser -- and least not right away. The problem occurs when people buy the cheapest LAC gas they can find every time they fill their tank. The low level of additives (or low quality additives) in the fuel will not be adequate to keep their engine clean, and sooner or later they'll start to experience drivability problems. Worse yet, if a bad batch of fuel leaves a refinery and ends up in people's vehicles, it can cause even more serious problems. There have been instances where too much residual sulfur in a bad batch of gasoline has caused a rash of fuel pump failures. Immediate drivability problems may also occur if the fuel is contaminated with water, contains too much alcohol or the wrong type of alcohol (methanol instead of ethanol). Alcohol is a great octane booster, but for ordinary gasoline the amount of ethanol should not exceed 10% (or 5% for methanol). The only exception here is E85 fuel for "flex-fuel" vehicles that is 85% ethanol and 15% gasoline. E85 contains less energy per gallon than gasoline and runs leaner, so the vehicle must have a special fuel sensor so the PCM can compensate for the alcohol to maintain the proper air/fuel ratio. REMOVING FUEL SYSTEM DEPOSITS When a vehicle is experiencing deposit-related drivability, performance or emissions problems, the deposits obviously have to go. The troublesome deposits can be removed a variety of ways. One cost-effective solution to deposit-related drivability issues is to simply add a can of fuel system cleaner to the fuel tank. The cleaner will slowly remove the deposits while the vehicle is driven. The only drawback with this approach is that it takes time -- maybe one or two tankfulls with the additive to make a noticeable difference. That may be too long for some people. For those who want a more immediate fix, the cure usually consists of cleaning the throttle body with an aerosol cleaner, flushing the injectors with a concentrated solvent or cleaning product, and/or feeding an intake system cleaner of some type into the engine while it is running to clean the intake ports, valves and combustion chamber. If injectors fail to respond to on-car cleaning, they can be removed for more thorough off-car cleaning on special equipment -- or replaced if they are clogged and can't be cleaned. For heavy carbon deposits inside the combustion chamber, a top cleaner product may be added to the engine and allowed to soak for 15 to 20 minutes to loosen the deposits. An oil change afterwards is recommended because some of the cleaner will end up in the crankcase. For extremely stubborn intake valve and combustion chamber deposits, blasting the valves through the spark plug holes or intake ports with a soft media such as walnut shells is an easier fix than pulling and disassembling the cylinder head for hand cleaning. To prevent the formation of new deposits once the engine has been cleaned, you should recommend using a top tier gasoline or adding a bottle of fuel system cleaner periodically to the fuel tank (say every four or five fill-ups or when changing the oil every 3000 miles).


FUEL CLEANING ADDITIVES NOT THE SAME One very important point to keep in mind about aftermarket fuel system cleaners that are added to the gas tank is that they use different chemistries to achieve different results. As we said earlier, some chemicals such as PBA can clean injectors and valves but may actually increase combustion chamber deposits. Other chemicals such as PEA can clean the entire fuel system as well as the combustion chambers. For dirty fuel systems, you should use a product that is concentrated enough to provide some real cleaning action. But for maintenance, you only need a product that keeps deposits from forming. One new fuel system cleaning product that has been recently introduced does something no other product does: it actually cleans and protects the contacts on fuel gauge sending units. The contacts on the sending unit are typically plated with silver-palladium to resist corrosion. But over time, residual sulfur in gasoline can corrode the contacts causing the gauge to rear erratically or not at all. Replacing the sending unit is an expensive job because you have to drop the fuel tank, so a more affordable alternative is to simply add a bottle of this product to the tank and let it take care of the corrosion. September 2012 Phillips 66 Survey Finds People Often Buy The Cheapest Gas According to a recent consumer survey by Phillips 66, 80 percent of young drivers claim to be knowledgeable about proper car care, but their behavior at the fuel pump says otherwise. The survey, taken by 1,018 American men and women age 21-30 who drive and are primary purchasers of gasoline, reveals that nearly half (49 percent) regularly fuel up with unbranded gasoline, despite the fact that it is known to cause engine deposit build-up over time that can inhibit gas mileage and engine performance. While 84 percent of respondents say they are more likely to care about their car's engine performance than its appearance, one in four (25 percent) millennial drivers admits they are NOT putting the best gas into their cars for long-term auto health. Their reason? Price! They often buy the cheapest gas they can find regardless of its quality. Survey findings prove that for more than half (54 percent) of those polled, cost is the most important factor when selecting which gas to use. In fact, 55 percent of respondents think the type of gas they use does matter for performance, but only 42 percent are likely to take the brand at the pump into consideration before purchasing. And while nearly half of respondents (41 percent) think additives signify quality gas, only three percent think this feature is key when selecting their gas. The survey says that although most drivers care about their cars, they often buy the lowest priced gasoline to save money in the short-term, without considering the performance impacts the resulting engine build-up may be causing long-term. TOP TIER Detergent Gasolines, like Phillips66 and other brands, include MORE detergent additives than is legally required to improve car performance almost immediately and minimize deposit formations in fuel injectors and the engine's intake valves. According to the survey, 98 percent of millennial drivers who use inferior gas would upgrade, with 45 percent willing to switch if superior or branded gas increased gas mileage and 35 percent willing to make the change if they believed there was a difference in the quality of the gas. The problem is, many think all gasoline brands are the same -- which is NOT true! Consumers may think they are saving money by seeking out cheaper gas. But what they may not realize is that the discount gasoline they are buying actually can cost them money in the long run by compromising their fuel economy and causing deposit build-up in their engine. By using a TOP TIER gasoline, motorists can keep their engines clean, maximize fuel economy and performance, adn avoid the need for expensive fuel injector service down the road. June 2015 Shell Introduces New Premium V-Power NITRO+ Premium Gas Shell's new V-Power NiTRO+ premium gasoline is Shell's most technically advanced premium fuel ever produced. The new fuel provides TOTAL engine protection by offering extra protection against engine wear, gunk and corrosion In recent years, premium gasoline sales and vehicles requiring premium fuels has been rising thanks to new engine technology. To meet the changing fuel requirements of today's engines, Shell launched Shell V-Power NiTRO+ Premium Gasoline. The fuel contains a combination of two key cleaning agents that perform better than the single component in the previous Shell V-Power formulation. This helps prevent wear in critical engine parts, protects critical fuel system components from corrosion, destroys gunk left behind by lower quality gasolines, and acts like a barrier to protect against gunk, wear and corrosion. Development of the new fuel formulation came through a technical partnership between Shell and Scuderia Ferrari, a leading supplier of Formula One racing fuels. The new Shell V-Power NiTRO+ Premium Gasoline contains 99 percent of the same ingredients as the Formula One racing fuel. For more information, visit Shell VPower.


Bad Gasoline Causes Performance Problems

Bad gas comes in many different varieties. There is the kind you get when you gulp down a double bean burrito. But not so funny is the kind that comes out of a pump nozzle in filling stations across the country. According to some sources, there is more bad gas out there than the industry is willing to admit - and it is causing a significant increase in drivability and emissions problems for many vehicles.


The two types of bad gas you should be most concerned about (bean burritos notwithstanding) are: Gasoline that does not contain adequate amounts of dispersant-detergent additives to keep fuel injectors, intake valves and combustion chambers clean. Gasoline that does not contain the advertised octane rating, or does not have adequate octane to prevent engine-damaging detonation. Poor Quality Gas The main issue with gasoline that fails to keep the fuel system clean is quality (or the lack thereof). To save a few pennies per gallon and increase the competitive margin (or profit margin) of his product, a gasoline supplier may choose to reduce or even eliminate the amount of dispersant-detergent additives in his fuel. Or, he may choose to use a less-effective product or one that causes other kinds of problems. Commonly used deposit-control additives include polysibutylamine, polyisbutylene succinimide and polyisobutylene phenylamine. But these same additives also can build up on intake valve stems causing them to stick. To prevent this from happening, additional additives called "fluidizers" also must be added to the fuel. But over time, these can contribute to the formation of combustion chamber deposits that raise compression and the engine's octane requirements. One of the best additives is polyetheramine. It keeps injectors, valves and combustion chambers clean without the help of any additional fluidizers - but it costs more than twice as much as the other commonly used additives. How much additive does it take to provide an adequate level of protection? Industry sources say the recommended level is about 1,000 parts per million (ppm) of dispersant-detergent in the fuel - which costs the gasoline supplier less than a penny a gallon. Even so, as much as 85% of the gasoline that is being sold contains only one-tenth the recommended dosage, or only 100 ppm of additive. Consequently, bad gas is good for the repair business. When people use gasoline that does not keep their fuel system clean, their injectors gradually clog up with varnish deposits. Some injectors (mostly the older pintle and nozzle style) are more vulnerable to clogging than others. It is not something most motorists notice right away because it takes time for the deposits to accumulate. But with every drive cycle, the accumulation of deposits gradually restricts the nozzle orifice causing a reduction in fuel delivery. Deposits also disrupt the normal injector spray pattern, which interferes with fuel atomization and mixing. This results in a lean fuel mixture that may cause the engine to misfire, idle poorly, and hesitate or even stall when accelerating. It does not take much of a restriction in an injector to lean out the fuel mixture. Only an 8-10% restriction in a single fuel injector can be enough to cause a misfire. A lean mixture caused by dirty injectors also increases the risk of detonation when the engine is working hard under load. Lean misfire at any speed increases hydrocarbon emissions that may trigger a misfire code and turn on the Check Engine light on 1996 and newer vehicles with OBD II systems. The code will often be a P0300 random misfire code, or you may find one or more misfire codes for individual cylinders depending on which injectors are affected most. Use of the proper amount of detergent additive helps wash away the varnish deposits and keeps the injectors flowing normally. Varnish buildup is worse after a hot engine is shut off and undergoes a period of heat soak. During this time, any residual fuel that is in the tips of the injectors evaporates and leaves behind the heavier waxy compounds that form varnish deposits. If the next batch of gasoline that squirts through the injectors when the engine is started does not contain enough cleaner, the deposits will remain and continue to accumulate. Eventually it builds up to the point where it restricts the injector and causes drivability problems. This requires cleaning the fuel injectors. On four-cylinder engines, the #2 and #3 injectors are in the hottest location and tend to clog up faster than the end injectors on cylinders #1 and #4. The same applies to the injectors in the middle cylinders in six- and eight-cylinder engines. The hotter the location, the more vulnerable the injector is to clogging during heat soak after the engine has been shut down.*


Off-car Injector Cleaning


Most high-mileage engines, as well as engines that are mostly used for short trip stop-and-go driving, will benefit from having the injectors (and the intake valves and combustion chambers) cleaned. Cleaning the fuel injectors restores normal fuel delivery and performance. Cleaning the intake valves removes deposits that can obstruct airflow (if thick enough). Intake deposits also can act like a sponge and absorb fuel causing a momentary hesitation when the throttle is suddenly opened. Removing combustion chamber deposits reduces compression and the risk of engine-damaging detonation (spark knock). Engines that use oil typically have heavy intake valve and combustion chamber deposits that do not respond well to normal levels of detergent in gasoline. Additional cleaner is needed, which can be added to the fuel tank or run directly through the injectors. Injectors can be cleaned in place or removed and bench-cleaned using special injector cleaning equipment. On-car cleaning is obviously the easiest approach because it requires less labor. If the injectors fail to respond well to cleaning, they will have to be replaced. It is an expensive repair, but one money-saving alternative here is to install "reman" injectors. In most cases, the reman injectors are nothing more than used injectors that have been cleaned and flow-tested.


The benefits realized by injector cleaning will obviously vary depending on the condition of the injectors prior to cleaning and how badly they were clogged. Really dirty injectors should show more of a noticeable improvement in performance than ones which have only a light accumulation of deposits. Either way, performance, fuel economy and emissions should all be better after a cleaning. To clean carbon deposits from the intake valves and combustion chambers, top cleaner can be used (just follow the instructions), or you can use equipment that is designed to clean the upper engine. Some experts recommend replacing the spark plugs after doing an on-car injection cleaning or decarbon treatment. The residue that is loosened and washed away by the solvent may increase the risk of plug fouling. Changing the oil and filter is also a good idea following a cylinder decarbon treatment because some of the solvent will get past the rings and end up in the crankcase.


GasolineOctane Fraud Low-octane gasoline involves a couple of different issues. One is outright fraud on the part of some gasoline retailers and distributors. Most states have a department of weights and measures that makes sure filling station pumps are accurately calibrated so patrons get a full gallon when they pay for a gallon. But most states have no way of policing fuel quality to make sure it meets the rated octane. Consequently, there is a big temptation to sell regular octane fuel at a mid-range or premium price. Most pumps offer three grades of gasoline: regular (87 octane), a mid-range blend (89 octane) and premium (91 octane). The numbers will vary a bit depending on the brand, the additives used and whether or not the fuel contains ethanol as an octane-boosting additive. A 10% ethanol blend typically adds a couple of points to the base octane rating. As the octane rating goes up, so does the price. Most pumps mix regular and premium to deliver the mid-range grade. There have been cases where people have tampered with pumps to change the mixture ratios for a more profitable blend. But the more common scam is to simply fill the underground "premium" tank with regular, or to dilute it with a few hundred gallons of lower octane fuel. It is a scam that is hard to detect. Even honest gasoline retailers can be ripped off by distributors who fail to deliver fuel that meets the full octane rating. Most vehicles do not need premium. A few do specify premium fuel in the owners manual, but these are mostly high-performance turbocharged or supercharged engines. The average vehicle should not need the extra octane unless it has a problem or a lot of miles and a heavy buildup of deposits in the combustion chambers. Then it might be worth the extra 20 to 30 cents more per gallon for premium. Of course, another valid reason for buying premium is to get a higher level of fuel-cleaning additives, which some grades of premium do contain. That is a purchasing decision the motorist has to make. The octane rating of the fuel depends on what is in it. Years ago, tetraethyl lead was used to boost the octane rating of gasoline. It was a great octane booster and also helped lubricate the valves to prolong valve and seat life. But lead is a heavy metal that is toxic to people and the environment. Lead also contaminates catalytic converters and oxygen sensors so it cannot be used in modern engines. Now they use methyl tertiary butyl ether (MTBE), which is made from natural gas, and ethyl tertiary butyl ether (ETBE), which is made from corn and natural gas. The higher the level of these additives, the higher the octane rating of the fuel. "Reformulated gasoline" (RFG) is now required in many urban areas to reduce air pollution. RFG requires extra refining to remove aromatic chemicals, and uses higher amounts of "oxygenates" such as MTBE, ETBE or ethanol alcohol. This raises the cost of RFG 2-10 cents a gallon and reduces its energy content about 1-3%. But the EPA insists the benefits outweigh the trade-offs. There is some evidence to suggest that RFG does not keep very well if allowed to sit in a vehicle fuel tank for long periods of time (say 8-10 days or more). According to one engine builder, the ingredients separate and absorb water, which can lean out the fuel mixture excessively and cause drivability problems. Vehicles that sit unused for long periods of time, therefore, can benefit from a dose of fuel stabilizer in the gas tank. Dealing With Detonation The best way to tell if an engine needs more octane is to see how it performs under load. If it knocks and pings, it needs more octane - or service. Any number of things can cause detonation, including: A defective Exhaust Gas Recirculation (EGR) system (valve is not opening or is disconnected). Engine overheating (check coolant level, operation of the fan and thermostat, radiator obstructions, etc.). Overadvanced ignition timing (should not be an issue on newer vehicles that lack timing adjustments). Defective knock sensor (if so equipped). Too much compression (combustion chambers need to be cleaned to remove heavy deposits). If an engine is experiencing detonation, you should always investigate the just mentioned possibilities to rule out any repairs that might be needed. On older engines that have distributors, retarding the timing a few degrees may help reduce or eliminate a detonation problem. If a performance engine has a lot of static compression (more than 10:1) and/or a supercharger or turbocharger, the only cure for a persistent detonation problem short of reducing compression or limiting boost is to use racing gasoline or an octane-boosting additive. Many octane-boosting additives also contain detergents to help keep the fuel system clean, so there is a double benefit to using this type of product. Dirty Gas Another problem is gas that has been contaminated with dirt, water or other liquids. Many filling station pumps have a filter that keeps dirt and corrosion that has settled in underground tanks from getting into their customer's fuel tanks - assuming they maintain the filters properly. But these filters will not remove water. Alcohol attracts water, and if there is enough water present it can make the alcohol separate from gasoline. Underground tanks have to meet stringent EPA requirements to prevent fuel leakage and soil contamination. Regular inspections are a must to ensure their integrity. But nothing is perfect and tanks sometimes leak and allow moisture to seep inside. We have seen vehicles that were misfiring, sputtering and stalling because they had bad gas in their fuel tanks. In some cases the gas was contaminated with water. In others, there was too much alcohol. We have even seen cars that somebody mistakenly filled with diesel fuel. The not-so-funny part is that hours were wasted trying to diagnose the cause. In the end, it turned out to be bad gas. Draining the tank and refilling it with fresh gas solved the problem completely. It does not happen very often, but fuel also can be cross-contaminated in pipelines, in storage facilities and distribution centers, and even in transit by moisture and other petroleum distillates such as diesel fuel, kerosene (jet fuel) and other chemicals. The most common cause of dirty gas, though, is the vehicle's own fuel tank. As the miles accumulate, the protective plating inside the tank can wear away allowing corrosion to occur. This obviously does not happen with plastic gas tanks but it is quite common with steel tanks. The small flakes of rust are then pulled into the fuel pickup strainer where they can clog the strainer, damage the fuel pump or plug the fuel filter. A lean fuel condition combined with lower-than-normal fuel flow and/or pressure is usually a good indication that the fuel system has a restriction - if the problem i not a weak fuel pump. If you check the filter and find it is plugged with debris, inspect the gas tank and clean it or replace it as needed if the tank is full of dirt or corrosion. Finally, if a vehicle cranks and has spark but refuses to start, check the fuel gauge. No gas is worse than bad gas.


Can Refueling Your Car Be Dangerous? The issue of static fires has been a hot topic in the news lately. Though rare, so-called static fires are not that uncommon. At a gas station, something as simple as a spark of static electricity can start a fire that can quickly leave a person engulfed in flames, fire safety experts say. A recent study by the Petroleum Equipment Institute found that there have been at least 130 confirmed cases of static fires. Most have occurred in the last three years. While the fires are rare, the hazard is significant, and consumers need to pay attention when they are at the gas pumps. Experts say most fires occur when a consumer goes back into their car, either to sit or to retrieve items while the gas pumps. Merely brushing against the car's interior can give the person a static charge, and if the first thing they touch when they return to the pump is the nozzle, there could be serious trouble. And taking your jacket off is just one of the things that can give you enough of a charge to start a fire. To avoid a possible static fire, experts say you should always remember to get rid of any static charge before you reach for the pump. That can be as simple as tapping the top of your car, the metal gas pump or a safety sticker on your window. And if a fire does start, never take the gas nozzle out of the car. Doing so is the surest way to turn a bad situation into a tragedy. When the nozzle is left in the car after a fire starts, the results are much less explosive. Another tip is never fill up gas containers unless they are on the ground. That is because a container - just like a person - can become statically charged. If the earth is not there to absorb the voltage, the can itself may spark. The solution is keeping the gas container on the ground, and on its side. Though the risk of fires may be low, each one that occurs is unacceptable, and easily avoided. Source: ABC News


Troubleshoot & Clean Dirty Fuel Injectors

Adapted from an article written by Larry Carley for Import Car magazine Clean fuel injectors are a must for peak engine performance, fuel economy and emissions. If the injectors are dirty and can't deliver their normal dose of fuel, performance, fuel economy and emissions are all going to suffer. Dirty injectors can't flow as much fuel as clean ones, nor can they delivery the correct spray pattern that is so essential for clean, efficient combustion. The fuel feedback control system will compensate for the leaning effect once it is in closed loop, but it can't correct the underlying condition that is causing the problem.


The injectors need to be cleaned, if an engine is experiencing any of the classic symptoms of dirty injectors, such as lean misfire, rough idle, hesitation and stumbling on light acceleration, a loss of power, and higher hydrocarbon (HC) and carbon monoxide (CO) emissions.

Lean misfire may also trigger a misfire code and turn on the Check Engine light on 1996 and newer vehicles with OBD II systems. The code often will be a P0300 random misfire code, or you may find one or more misfire codes for individual cylinders, depending on which injectors are most affected.

FUEL INJECTOR CLOGGING It doesn't take much of a restriction in an injector to lean out the fuel mixture. A restriction of only 8% to 10% in a single fuel injector can be enough to cause a misfire. When this occurs, unburned oxygen enters the exhaust and makes the O2 sensor read lean. On older multiport systems that fire the injectors simultaneously, the computer compensates by increasing the "on" time of all the injectors, which can create an overly rich fuel condition in the other cylinders. In turbocharged engines, dirty injectors can have a dangerous leaning effect that may lead to engine-damaging detonation. When the engine is under boost and higher rpms, it needs all the fuel the injectors can deliver. If the injectors are dirty and can't keep up with the engine's demands, the fuel mixture will lean out, causing detonation to occur. All vehicles are vulnerable to injector clogging, but the ones that are most vulnerable and most likely to experience such driveability and emissions problems are older ones with pintle-style multiport injectors. Later injector designs are more resistant to clogging. In the early pintle-style injectors, the nozzle's shape and orifice size determine how much fuel flows through the injector and the shape of the spray pattern. Most pintle-style injectors are designed to produce a cone-shaped spray pattern. But, if fuel deposits accumulate in the nozzle area, it can restrict fuel delivery and break up the spray pattern, causing a lean fuel condition and many of the problems just mentioned. Where do the deposits come from? Mostly from the fuel itself. Gasoline is a mixture of many different hydrocarbons, including oilfins, which are heavy, waxy compounds. The heavier the hydrocarbon, the more energy it yields when it burns. When the engine is shut off, the injectors undergo heat soak. Fuel residue in the injector nozzles evaporates, leaving the waxy oilfins behind. Because the engine is off, there is no cooling air flow through the ports and no fuel flow through the injectors to wash it away, so heat bakes the oilfins into hard varnish deposits. Over time, these deposits can build up and clog the injectors. The formation of these deposits is a normal consequence of engine operation, so detergents are added to gasoline to help keep the injectors clean. But if a vehicle is used primarily for short-trip driving, the deposits may build up faster than the detergents can wash them away. On four-cylinder engines, the #2 and #3 injectors are in the hottest location and tend to clog up faster than the end injectors on cylinders #1 and #4. The same applies to the injectors in the middle cylinders in six and eight cylinder engines. The hotter the location, the more vulnerable the injector is to clogging from heat soak. Throttle body injectors are less vulnerable to heat soak because of their location high above the intake manifold plenum.


CHEAP GAS MAKES MATTERS WORSE To save a few pennies per gallon and to increase the competitive and/or profit margin of gasoline, some suppliers have cut back on the amount of detergent they add to their fuel or have switched to cheaper and less effective additives. Commonly used deposit-control additives include polysibutylamine, polyisbutylene succinimide and polyisobutylene phenylamine. But these same additives also can build up on intake valve stems causing them to stick. To prevent this from happening, additional additives called "fluidizers" must also be added to the fuel. But, over time, these can contribute to the formation of combustion chamber deposits that raise compression and the engine's octane requirements.


Dirty injectors lean out the fuel mixture and contribute to lean misfire, hesitation and even detonation. Cleaning should restore like-new performance. One of the best additives is polyetheramine. It keeps injectors, valves and combustion chambers clean without the help of any additional fluidizers - but it costs more than twice as much as the other commonly used additives. How much additive does it take to provide an adequate level of protection? Industry sources say the recommended level is about 1,000 parts per million (ppm) of dispersant-detergent in the fuel - which costs the gasoline supplier less than a penny a gallon. Even so, as much as 85% of the gasoline that is being sold contains only one-tenth of the recommended dosage, or only 100 ppm of additive. Consequently, using cheap gas contributes to the formation of injector deposits.


Cleaning injectors off-car takes more time and effort, but usually delivers much better results than on-car cleaning.

BENEFITS OF CLEANING FUEL INJECTORS

The benefits realized by injector cleaning obviously will vary depending on the condition of the injectors prior to cleaning and how badly they were clogged. Injectors that are really dirty should show more of a noticeable improvement in performance than ones that have only a light accumulation of deposits. Either way, performance, fuel economy and emissions should all be better after a cleaning.
Most high-mileage engines as well as engines that are used mostly for short trip stop-and-go driving are the most likely prospects for injector cleaning. Some experts recommend cleaning the injectors every 25,000 to 30,000 miles to keep them flowing at peak efficiency.

OTHER COMPONENTS THAT MAY NEED CLEANING

Another component that also may need to be cleaned to remove fuel varnish is the throttle body. Fuel vapor rising up through the intake manifold can accumulate and vaporize around the throttle plate and air bypass circuits, causing a change in the idle air/fuel mixture. Sometimes you can see the deposits, and sometimes you can't. Either way, cleaning the throttle body and intake tract also may be necessary to fully restore engine performance, idle quality and emissions. An aerosol cleaning solvent works well here.
The intake valves and combustion chambers should also be cleaned when you do the injectors to remove deposits that may also be contributing to driveability and emissions problems. Deposits on the backs of intake valves can act like a sponge and absorb fuel, causing a momentary hesitation when the throttle is suddenly opened. Combustion chamber deposits increase compression and the risk of engine-damaging detonation (spark knock).
Engines that burn oil typically will have heavy intake valve and combustion chamber deposits that do not respond well to normal levels of detergent in gasoline. Additional cleaner is needed, which can be added to the fuel tank or run directly through the injectors.
To remove carbon deposits from the intake valves and combustion chambers, use a "top cleaner" type of product and follow the instructions, or use equipment that is designed to clean the upper engine (such as a Motorvac Decarbon machine).


Direct injection fuel injectors have very precise spray patterns and are even more sensitive to deposits than regular injectors.


Injector spray patterns can show if any are misshapen or contain streamers of unvaporized liquid.

Some experts recommend replacing the spark plugs after doing an on-car injection cleaning or decarbon treatment. The residue that is loosened and washed away by the solvent may increase the risk of plug fouling. Changing the oil and filter is also a good idea following a cylinder decarbon treatment because some of the solvent will get past the rings and end up in the crankcase.


FUEL INJECTOR CLEANING OPTIONS Should you clean the injectors in place or remove them and use some type of injector cleaning machine? It depends. The easiest route is to clean the injectors in place because you do not have to remove the injectors (which can be a real chore on some import engines). Running cleaner through the injectors while the engine is running also removes many of the deposits on the valves and inside the combustion chambers. This eliminates the need for an extra cleaning step if the engine is full of carbon deposits. The job takes only 10 to 15 minutes, and you can usually tell right away if the treatment addressed the problem (engine runs smoother, idle misfire gone, etc.). When doing the cleaning procedure itself, you must use pressurized equipment to feed the solvent directly into the fuel rail while the engine is running. This means you either have to disable the fuel pump and plug the fuel return line, or install a U-tube so the fuel will recirculate right back to the tank. Disabling the fuel pump can set a fault code on some cars, requiring you to clear the code after the job is done. Easy as it is, there are some limitations with on-car injector cleaning. One is that badly clogged injectors may not pass enough solvent during a normal cleaning cycle to be thoroughly cleaned. Some baked-on deposits can be very difficult to remove, requiring you to prolong or repeat the cleaning process. And if on-car cleaning does not work? You will have to remove the injectors and have them cleaned on an injector cleaning machine - or replace them. Another limitation with on-car injector cleaning is that you may have to do some additional tests to confirm that the injectors responded well enough to your cleaning efforts. A test drive may be needed to see if the driveability symptoms have been eliminated, or you may have to check emissions to make sure HC and CO levels are back to normal. A power balance test is another way to confirm engine performance and check for weak cylinders (there should be less than a 10% power variation between cylinders). An injector pressure drop test will tell you if the injectors are flowing evenly or not. There may be some risk to the vehicle's fuel system when using concentrated solvent to clean the injectors in place. Most equipment suppliers say to disconnect and plug the fuel return line so that solvent does not circulate back to the fuel tank. Strong solvents may attack rubber and plastic components in the fuel pump, regulator and fuel lines, creating additional problems that you don't need. On-car injector cleaning also involves some risk to the person who's performing the service. You have to disconnect pressurized fuel lines, make sure there are no fuel leaks, and feed high-pressure solvent (which is just as flammable as gasoline) into the engine while the engine is running. Safety precautions should always include eye protection, making sure there are no open sources of ignition (sparks) nearby, and avoiding direct exposure with the cleaning solvent.


OFF-CAR FUEL INJECTOR CLEANINGI 
njectors that are really dirty may not respond well to on-car cleaning. You may have to use a more powerful solvent and/or longer cycle time to loosen the baked-on deposits. That is where an off-car injector cleaning machine really helps. Off-car injector cleaning is a more expensive service because of the labor involved to remove the injectors (which can be considerable on some applications), and it requires special equipment that can cost anywhere from $4,000 to $8,300.


Many shops charge between $25 and $35 per injector for off-car cleaning - which makes it more costly than on-car cleaning. But it also can motorists a lot of money because off-car cleaning is a lot cheaper than replacing the injectors with new ones (which can cost hundreds of dollars a set!).
Off-car injector cleaning can often restore dirty injectors that fail to respond to on-car cleaning. That is why some shops do only off-car cleaning. They do not want to have to clean the injectors twice. Off-car cleaning takes more time (typically 30 to 45 minutes after the injectors have been removed), and most machines have an ultrasonic bath that can be used to soak badly clogged injectors. Some machines also reverse-flush the injectors, which provides an added measure of cleaning.
Another reason for using off-car cleaning equipment is that the injectors can be flow-tested after they have been cleaned to verify their performance. The injectors typically are mounted on a test manifold and energized to spray solvent into clear graduated cylinders. By comparing the volume of fuel delivered, it is easy to see if all the injectors are flowing evenly.
As a rule, you should see less than 5% to 7% variation between injectors (some performance engine builders aim for 1% or less variation between injectors!). If an injector is not passing as much liquid as its companions, you can subject it to more cleaning. And, if it fails to respond to additional cleaning, there is no guesswork about which injector needs to be replaced.
Flow-testing also allows you to compare the actual flow rate of each injector to factory specifications. If the flow is within specifications, you know the injector should perform properly when it is reinstalled back in the engine. Flow-testing also is a good way to make sure the injectors are the right ones for the engine (one or more injectors may have been previously replaced by someone else).
A flow test on the cleaning equipment allows you to see each injector's spray pattern. If you see a normal, cone-shaped mist, you know the injector is flowing properly. If you see streamers of unvaporized liquid in the spray pattern, you know additional cleaning is needed or the injector needs to be replaced.


Diagnosing Returnless Fuel Injection Systems


Returnless systems are found on many late model cars and trucks. "Returnless" refers to the fact that these systems have the fuel pressure regulator inside the fuel tank. This eliminates the need for a fuel return line from the fuel injector rail on the engine to reroute excess fuel back to the fuel tank.

The first returnless fuel injection systems appeared back in 1993 on certain Chrysler V6 and V8 truck engines. By 1998, all Chrysler cars and light trucks had them. In 1996, Toyota introduced its first returnless system, followed by General Motors and Ford in 1999. Honda went "returnless" in 2001, and today you'll find returnless fuel injection systems on almost all new vehicles.


In older return-type systems, the fuel pump delivers more fuel to the engine than it actually needs. The excess fuel is then routed back to the fuel tank through a pressure regulator and return line. This can increase the temperature of the fuel because of the heat it picks up while circulating through the fuel rail in the engine compartment. Eliminating the return line keeps fuel temperatures lower and more consistent for better fuel economy and emissions.


FUEL SYSTEM OPERATION A returnless fuel injection system manages fuel pressure a little differently. Instead of using a spring-loaded vacuum diaphragm in the regulator to change fuel delivery when throttle opening and intake vacuum change, the regulator in a returnless system operates at a constant pressure. The older return-type systems need to vary fuel pressure to maintain the same pressure differential across the injectors when intake vacuum drops. When vacuum drops, the regulator increases pressure to compensate. But in a returnless system, this isn't necessary because the line pressure is always the same. So how does the system compensate for changes in engine load and vacuum? A returnless system uses the Powertrain Control Module (PCM) to regulate fuel delivery. A fuel pressure sensor mounted on the supply rail allows the PCM to monitor fuel pressure. When pressure in the supply rail drops as engine load or speed increase, the PCM compensates by increasing injector duration (on time) and/or the operating speed of the fuel pump. Some systems (Ford, for example), vary the fuel pump's output by changing the voltage supply to the fuel pump module. When more fuel is needed, pump speed is increased by increasing the pulse-width (on-time) of the pump's voltage signal (pulse-width modulation). WHY RETURNLESS FUEL INJECTION? The older return-type fuel injection systems circulate a lot of fuel between the engine and tank. This keeps the fuel from getting too hot and boiling as it passes through the fuel rail on the engine (which can cause vapor lock and hard starting or stalling on hot days), but it also carries a lot of heat back to the fuel tank. Heat increases fuel vaporization inside the fuel tank, and puts more of a strain on the Evaporative Emissions (EVAP) control system. The EVAP system's job is to contain fuel vapors so they do not escape from the fuel tank and pollute the atmosphere. Fuel vapors pass through a vent hose to a charcoal-filled canister which temporarily traps and stores the vapors. Later, the vapors are purged from the canister via a control valve and routed into the engine while the vehicle is being driven. The trouble is, EVAP systems have limited capacity and can only store so much fuel vapor. If the fuel is getting hot and vapor pressure is building up inside the tank, it can saturate the charcoal canister and overload the EVAP system's ability to contain the vapors creating a potential emissions problem. On newer vehicles with OBD II, the onboard diagnostic system is required to monitor the fuel system for vapor leaks. If the fuel in the tank gets too hot and builds up excessive pressure, it may cause a leak that will turn on the Malfunction Indicator Lamp (MIL) and set a diagnostic trouble code (DTC). What's more, the U.S. Environmental Protection Agency tightened the limits for evaporative emissions, making it even more important to control fuel vapor pressure inside the tank. With returnless systems, there is no return line and no circulation of fuel back to the fuel tank from the engine. Consequently, there is no heating of the fuel in the tank and no increase in fuel vapor pressure from driving the vehicle. This reduces the risk of excessive pressure build up inside the fuel tank, vapor leaks, and triggering an OBD II EVAP monitor DTC.


OTHER RETURNLESS FUEL INJECTION DIFFERENCES Another difference is that returnless systems typically operate at a higher pressure than return-type systems. This is necessary to reduce the risk of fuel boiling and vapor lock in the injector supply rail during hot weather (since there is no recirculation of fuel from the engine back to the tank to keep the supply rail cool). Returnless systems are very sensitive to fuel pressure, and if pressure is more than a few pounds out of specifications, it may be enough to cause a driveability or emissions problem. Fuel pressure checks on returnless systems can be done in the usual way by attaching a gauge to the service valve fitting on the fuel supply rail, or you can hook up a scan tool and read the pressure value via the pressure sensor. Using a fuel pressure gauge to cross-check the accuracy of the electronic reading is a good way to check for a fuel pressure sensor that is out of calibration. Remember, returnless systems are designed to operate at a constant pressure. A simple pressure check with a gauge or scan tool will tell you if the system is within specifications. Pressure should also be monitored with a scan tool while driving the vehicle to check for pressure loss under load. If the operating pressure is out of range, the PCM will compensate by increasing or decreasing the short term fuel trim (STFT) and long term fuel trim (LTFT) values. As a rule, these numbers should usually be within plus or minus 10 points. If you see a higher or lower value on your scan tool, it may indicate a fuel mixture problem due to incorrect fuel pressure (bad fuel pressure sensor, bad fuel pressure regulator, a weak pump or low pump voltage), or an air leak, or dirty fuel injectors. VOLUME JUST AS IMPORTANT AS PRESSURE Fuel volume is just as important as pressure in all fuel injection systems. The pump has to push enough volume of fuel to keep up with the engine's demands when it is under load, accelerating hard or running at wide open throttle. A weak pump may still produce enough pressure to be within specifications at idle, but may not deliver enough fuel at high rpm and load, causing fuel starvation, lean misfire and a loss of power. As a rule, a "good" pump will deliver at least 750 ml (3/4 quart) of fuel in 30 seconds. Sometime a low pressure or volume problem isn't the fuel pump but a clogged filter, plugged fuel inlet filter sock, restricted fuel line or a faulty fuel pressure regulator. A low voltage supply to the fuel pump due to a wiring problem, low charging voltage or bad relay may also prevent the pump from operating at normal speed.


A returnless fuel pump assembly contains the pump, filter and regulator, plus the fuel level sensor and float. Many applications also have a control module to regulate pump speed and monitor the pump's health


RETURNLESS FUEL INJECTION TECH TIPS

* On returnless systems that use pulse-width modulation to vary the operating speed of the fuel pump, you should be able to read the value of the control signal on your scan tool. Look for a change in the number when engine speed/load change.
* The injector on the furthest end of the fuel rail(s) in a returnless system may be more prone to dirt contamination and clogging than injectors further upstream. Because there is no circulation of fuel back to the tank, the end of the fuel rail may become a sewer pipe and collect any debris that gets past the filter. The debris may clog the inlet screen in the injector and starve the injector causing that cylinder to run lean and misfire.
Cleaning the injectors on the engine may not help because the debris may remain trapped in the end of the fuel rail. It may be necessary to remove the injector(s) and fuel rail(s) for cleaning, or to replace the rail if the debris cannot be flushed out.
* For best performance, injector flow rates should not vary more than about 5% from one injector to the next on returnless systems. Injector flow rates can be measured and compared on a test bench. If this is not possible, and one or more injectors are clogged or dirty (and do not respond to cleaning), you should recommend replacing the entire set of injectors. Why? Because if you only replace the "problem" injector(s), the new one(s) will likely flow more fuel than the old ones (unless all have been cleaned and flow tested). This can create an overly rich condition in the cylinders with the new injectors, and cause a driveability or emissions problem you didn't have before.
* Most fuel pump failures are caused by dirt or rust in the fuel tank. So it is very important to inspect the inside of the tank when a pump is replaced. If the tank is dirty, steam clean it. If a metal tank contains rust, replace it.
* When replacing a fuel filter, pour a little fuel through the filter inlet to "pre-wet" the filter element inside. This will reduce the risk of the filter element shredding loose paper fibers into the fuel system when the pump starts up and sends fuel at full force through the filter.


RETURNLESS FUEL INJECTION FUEL FILTERS Another difference between some return-type and returnless fuel injection system is the location of the fuel filter. In most return-type systems, an in-line filter is positioned somewhere between the fuel tank and engine. The filter may be located under the vehicle in the fuel line that carries fuel from the tank to the engine, or in the engine compartment on the firewall or fuel rail. The filter typically has an OEM recommended replacement interval of 30,000 to 50,000 miles. On some returnless systems, an in-line filter is also used. It may be located in the fuel line or engine compartment. On some hybrid "semi-returnless" systems, the filter is located outside the tank and routes fuel back to the tank through a third return port. But on some returnless systems, the fuel filter is located inside the fuel tank and is part of the fuel pump module or regulator. What's more, on some of these applications (Dodge Neon, for example), there is no OEM recommended replacement interval for the fuel filter! Others say to replace the filter "as needed." One reason for the extended filter life is because a returnless system pumps much less fuel through the filter. A typical return-type system may circulate up to 30 gallons of fuel per hour through the filter and return line. With a returnless system, the only fuel that passes through the filter is that which the engine burns. On a vehicle that gets 20 miles per gallon, that would only be about 3 gallons of fuel in an hour at 60 mph. This doesn't mean a filter with no OEM recommended replacement interval will last forever. It won't. Eventually, the filter will become clogged and have to be replaced -- and when it does the fuel tank will have to be drained and lowered to gain access to the filter and pump (unless the vehicle has an access panel under the back seat or in the trunk). The life of the filter will depend on the cleanliness of the fuel that goes into the tank, driving conditions and corrosion inside the fuel tank (not an issue with plastic fuel tanks but can be with aging metal tanks). If engine driveability or emissions problems indicate a restricted fuel filter, the fuel filter must be replaced regardless of mileage. It can also be replaced at any mileage interval for preventive maintenance, though in the case of an in-tank filter that could be an expensive and labor-intensive job. On many of these returnless applications with in-tank filters, the fuel filter probably won't be replaced until the pump fails -- so it is very important to make sure you also install a new filter when you replace the pump. The pump pickup "filter sock" should also be replaced when the pump is changed. And don't forget to inspect the inside of the tank for dirt or rust!

jeudi 26 octobre 2017

Idle Surge

If a vehicle idles erratically and surges (idle speed is not steady and increases and decreases), the problem may be a buildup of carbon or fuel varnish deposits in the idle speed control valve (also called the idle air control valve or IAC valve). The cure for this condition is to clean the valve with some aerosol throttle cleaner or engine top cleaner.
Here's how to clean the IAC valve: Disconnect the air intake ductwork from the throttle body. Start the engine, then increase and hold the idle speed to 1,000 to 1,500 rpm. Spray the throttle cleaner or engine cleaner into the throat of the throttle body, aiming for the idle air bypass port (usually located on the side or top of the throttle body opening). Give this area a good dose of cleaner (about 10 second's worth). Turn the engine off to allow the cleaner to soak into the IAC passageway. Wait about three minutes. Restart the engine, rev and hold at 1,000 to 1,500 rpm, and repeat the cleaning process again. Turn the engine off again, and reattach the air intake duct work to the throttle body. Start the engine and rev and hold to 1,500 to 2,000 rpm until no white smoke is coming out of the exhaust pipe.

Cleaning the Idle Air Speed Control Valve with aerosol throttle cleaner can often solve an idle problem. If this fails to make any difference, you can remove the IAC valve from the throttle body and spray cleaner directly on the tip of the valve and/or into the ports in the throttle body. Let the cleaner soak awhile, repeat as needed, then reinstall the IAC valve, start the engine and run it at 1,500 to 2,000 rpm as before until no white smoke is seen in the exahust. If the idle speed still surges after this, the IAC valve is defective and needs to be replaced.


If the old Idle Speed Control Valve fails to respond to cleaning, replace it with a new one.

Troubleshoot Idle Speed Control System


The Idle Speed Control (ISC) valve, also called an Idle Air Control (IAC) valve, is used on both throttle body and multipoint fuel injected engines to regulate idle speed. Chrysler calls theirs an Automatic Idle Speed (AIS) motor while Ford refers to theirs as an Idle Speed Control (ISC) solenoid. The IAC valve opens a small bypass circuit that allows air to bypass the throttle. Increasing the volume of air that flows through the bypass circuit around the throttle increases idle speed. Reducing the bypass airflow decreases idle speed. The ISC valve is controlled by the engine's computer (powertrain control module or PCM). The computer monitors idle speed by counting ignition pulses from the ignition module in the distributor or crankshaft position sensor when the throttle position sensor or throttle switch signals the computer that the throttle is closed and the engine is at idle. When the engine's idle speed is above or below the preset range in the computer's program, the computer commands the ISC valve to either increase or decrease the bypass air flow. Additional sensor inputs from the coolant sensor, brake switch and speed sensor may also be used by the computer to regulate idle speed according to various operating conditions. Idle speed may also be increased when the A/C compressor is engaged, the alternator is charging above a certain voltage, and/or the automatic transmission is in gear to prevent the engine from lugging down.

DIAGNOSING IDLE SPEED PROBLEMS

If you engine is idling too fast, too slow or stalling, the problem may not be the idle speed control system, but an engine vacuum leak. Check for vacuum leaks first to rule out this possibility.
A common condition is to find the idle air bypass solenoid extended all the way out (closed). This usually means the engine has an air leak and the PCM is trying to bring the idle speed back down by closing the idle air bypass circuit.
If there is an open or short in the idle air control solenoid, wiring or driver circuit, or the idle speed it out of range, it will usually set one or more fault codes and turn on the Check Engine light. If the light is on, you need to plug a scan tool into the diagnostic connector and read out the codes that set the light.
GENERAL MOTORS IDLE SPEED CONTROL On older pre-OBD II cars, A code 11 indicates a problem in the idle air control circuit. On OBD II vehicles (1996 & newer), codes P505 to P509 indicate a fault with the idle speed control system. The diagnostic procedure involves disconnecting ISC motor, then starting the engine to see if the idle speed increases (it should). Turn the engine off, reconnect IAC and start the engine again. This time the idle speed should return to normal. If it does, the problem is not in the IAC circuit or motor. Check for vacuum leaks or other problems that would affect idle speed. If the idle speed does not change when the IAC is unplugged, and/or does not return to normal after reconnecting the unit, use a test light to check the idle speed control solenoid wiring circuits while the key is on. The test light should flash on and or go from bright to dim on all four circuits if the PCM and wiring are okay (this would tell you teh fault is in the ISC motor). If the test light fails to flash on one or more circuits, the fault is in the wiring or PCM.

FORD IDLE AIR BYPASS Ford doesn't use idle air bypass to regulate idle speed on its older throttle body (CFI) applications, but uses a solenoid or vacuum diaphragm instead to open the throttle linkage. Idle air bypass is used only on multipoint injection applications. On older pre-OBD II cars, codes 12, 13, 16, 17 & 19 all indicate idle speed is out of spec (too high or too low). Codes 47 and 48 indicate a fuel mixture problem which could be caused by an air leak. On OBD II vehicles (1996 & newer), codes P505 to P509 indicate a fault with the idle speed control system. The diagnostic procedure when any of these codes are found is to turn the engine off, unplug the ISC bypass air solenoid connector, then restart the engine to see if the idle rpm drops (it should if the ISC solenoid is working). No change would indicate a problem in the motor or wiring. The ISC solenoid can be checked by measuring its resistance. With the positive lead of a digital volt/ohm meter on the VPWR pin and the negative lead on the ISC pin, measure the resistance of the solenoid. On many applications, the spec calls for 7.0 to 13.0 ohms. If it is out of specs, the ISC solenoid is bad. Also check for shorts between both ISC solenoid terminals and the case. If the ISC checks out okay, check for battery voltage between the ISC connector terminals while the key is on. Voltage should also vary when the engine is running. No voltage indicates a wiring or computer problem.

CHRYSLER IDLE SPEED CONTROL On pre-OBD II Chryslers, a Code 25 means there is a problem in the AIS motor driver circuit. On OBD II vehicles (1996 & newer), codes P505 to P509 indicate a fault with the idle speed control system. The AIS driver circuit can be checked with a bi-directional scan tool using commands to increase idle speed. No change in commanded idle speed would tell you there is a problem in the driver circuit, the wiring or the solenoid. You can remove the AIS from the throttle body to see if the valve pintle is moving in and out, or simply listen for the motor to buzz. In the engine running test mode #70, which checks the throttle body minimum air flow, depressing and holding the proper button on a hand held scan tool should close the AIS bypass circuit. At the same time, ignition timing and fuel mixture are fixed. Idle speed should increase to about 1300 to 1500 rpm. If it doesn't match the specs, the minimum air flow through the throttle body is incorrect. INSTALLING A NEW IDLE SPEED CONTROL SOLENOID When installing a new GM IAC or Chrysler AIS solenoid, the pintle must not extend more than a certain distance from the housing. The specs vary so check the manual or look up the specs in the OEM service literature. Chrysler says one inch (26 mm) is the limit, while some GM allows up to 28 mm on some units and 32 mm on others. If the pintle is overextended, it can be retracted by either pushing it in (GM) or by connecting it to its wiring harness and using actuator test 03 to move it in (Chrysler).

mercredi 27 septembre 2017

Problem: Engine Hesitation

Hesitation is when your engine misfires, stumbles or lacks power when you accelerate or step on the throttle. The problem often means the air/fuel mixture is not being properly enriched or is going lean, or the ignition system is weak and is misfiring when the engine comes under load or the air/fuel mixture goes lean. When you step down on the accelerator and the throttle opens, the engine sucks in more air. The computer should respond by adding more fuel.


If the engine has a speed-density type of fuel injection system (no airflow sensor), the computer uses inputs from the throttle position sensor, manifold absolute pressure sensor, air temperature sensor and engine rpm to estimate airflow and how much fuel the engine needs. NOTE: Speed-density systems are much less sensitive to vacuum leaks than EFI systems that use an airflow sensor. If the engine has an airflow sensor (vane airflow or mass airflow), it looks primarily at the airflow signal from the airflow sensor, but also takes into account what the throttle position sensor and MAP sensor (if equipped) are telling it. NOTE: Airflow EFI systems are very sensitive to vacuum leaks, and air leaks downstream of the airflow sensor. Consequently, if the inputs from any of these sensors is inaccurate or missing, the engine computer may not add enough fuel, allowing the fuel mixture to go lean causing a misfire that produces a hesitation or stumble when accelerating or opening the throttle. The amount of fuel added by the computer when the throttle opens may also be insufficient if the fuel injectors are dirty or fuel pressure is low. The oxygen sensors in the exhaust monitor the air/fuel mixture so the computer can adjust fuel trim as needed to maintain the proper air/fuel ratio. Fuel trim adjustments can compensate for dirty injectors and/or low fuel pressure to a certain extent, but occur too slowly to offset a throttle hesitation problem. Vacuum leaks will typically cause the fuel trim to run rich as the computer tries to compensate for the extra air being sucked into the engine through the leak. Possible Causes of Engine Hesitation or Stumble: * Dirty fuel injectors (cleaning the injectors often fixes this). * Bad MAP (manifold absolute pressure) sensor * Bad TPS (throttle position) sensor * Bad or dirty MAF (mass airflow) sensor * Low fuel pressure (leaky fuel pressure regulator, weak fuel pump or low system voltage or charging voltage that causes the fuel pump to run slow) * Vacuum leaks (intake manifold, vacuum hoses, throttle body, EGR valve) * Bad gasoline (fuel contaminated with water or too much alcohol) Sometimes, what feels like a hesitation is actually ignition misfirerather than lean misfire. The causes of ignition misfire may include: * Dirty or worn spark plugs * Bad plug wires * Weak ignition coil * Wet plug wires


A scan tool that can display sensor data and fuel trim values can help you diagnose a hesitation problem.

DIAGNOSE ENGINE HESITATION PROBLEM

Diagnose may require checking the engine computer with a scan tool for any fault codes (including misfire codes), checking sensor response with a scan tool by looking at the various sensor PIDS (sensor values displayed on the scan tool), and testing sensors with a DVOM or scope if the values are out of range or the sensor is not responding normally. Additional diagnostic checks may include searching for vacuum leaks, inspecting/cleaning the EGR valve, measuring fuel pressure and volume, removing and inspecting the spark plugs, etc.
You can use a scan tool to check the fuel trim readings to see if the engine is running lean. Lean mixtures that are caused by vacuum leaks will have the most noticeable effect at idle. At part and full throttle, there is so much air entering the engine that a little extra air from a vacuum leak has a negligible effect.


Plug your scan tool into the diagnostic connector and start the engine, then look at the Short Term Fuel Trim (STFT) and Long Term Fuel Trim (LTFT) values. Normal range is typically plus or minus 8. If the numbers are +10 or higher for STFT and LTFT, the engine is running LEAN. If you rev the engine to 1500 to 2000 rpm and hold it for a minute or so, and the STFT value drops back down to a more normal reading, it confirms the engine has a vacuum leak at idle. If the STFT value does not change much, the lean fuel condition is more likely a fuel delivery problem (weak fuel pump, restricted fuel filter, dirty fuel injectors or a leaky fuel pressure regulator) than a vacuum leak. For more information about using fuel trim to diagnose a lean fuel condition, read this article on Fuel Trim by Wells Manufacturing (PDF file, requires Adobe Acrobat to read). DIAGNOSTIC TIPS FOR P0171 OR P0174 LEAN TROUBLE CODES A code P0171 or P0174 (or both) indicate the engine is running lean. This means there is too much air and/or not enough fuel. If you have a scan tool that can display Short Term Fuel Trim (STFT), you can confirm the engine is running lean by looking at the STFT at idle. If STFT is greater than about 10 to 12, the engine is running LEAN. Increase engine speed to 1600 to 2000 rpm and hold for a minute or so, then recheck the STFT value. If it has dropped 3 or 4 points or more, the lean problem is due to a vacuum leak (vacuum leaks have more of an impact on the idle fuel mixture than the cruise mixture). If the STFT valve is still the same, the problem is probably sensor-related (dirty or bad MAF sensor, or bad MAP sensor), or is due to low fuel pressure. The next steps would be to use the scan tool to look at the airflow and MAP sensor readings, and to check fuel pressure. A lean fuel condition can be caused by: * Low fuel pressure due to a weak pump or leaky fuel pressure regulator. (use a fuel pressure gauge to check fuel pressure at idle) * Dirty fuel injectors. (try cleaning the injectors) * Vacuum leaks at the intake manifold, vacuum hose connections or throttle body. (Check for vacuum leaks) * Leaky EGR valve. (Check the operation of the EGR valve) * Leaky PCV Valve or hose. (Check valve and hose connections) * Dirty or defective Mass Airflow Sensor (MAF). (Try cleaning the MAF sensor wires or filament with aerosol electronics cleaner. Do NOT use anything else to clean the sensor, and do not touch the sensor wires) * TIP: On many Fords, a P0171 and/or P0174 Lean Code may sometimes appear because of a bad Differential Pressure Sensor (DPFE). This sensor monitors EGR flow, and is located on the engine near the EGR valve. There are two hoses that connect the sensor to the tube that runs from the exhaust manifold to the EGR valve. The sensor misreads EGR flow and the computer increases EGR which has a leaning effect on the fuel mixture. The fix is to replace the DPFE sensor. * TIP: For information about other causes of P0171 and P0174 lean codes on Ford Windstar, Click Here REPAIRS Repairs will depend on what is causing the hesitation. If the cause is fuel related, it may require cleaning the fuel injectors or fixing a vacuum leak. If the cause is ignition related, it may require replacing the spark plugs and plug wires.


Poor Fuel Economy

Is your vehicle delivering poor fuel economy? Have you noticed a gradual or sudden drop in the mileage you were once getting? The following are common causes of poor fuel economy that may or may not turn on your Check Engine Light or cause a loss of fuel economy:
Sluggish Oxygen Sensors

The oxygen sensors on your engine monitor the air/fuel mixture so the powertrain control module can add or subtract fuel as needed to meet changing operating conditions. As Oxygen sensors age, they become less responsive to changes in the air/fuel mixture, and typically produce a lean-bias signal. This tells the engine computer to add more fuel, when in fact the engine really doesn't need the extra fuel. The end result is a richer than normal fuel mixture that increases fuel consumption.

The fix here is to use a scan tool and/or digital storage oscilloscope to test the response of the oxygen sensors. Or, if your vehicle has a lot of miles on it (over 100,000) to simply replace the O2 sensors if you suspect they are getting sluggish.
You can also use a scan tool to look at Long Term Fuel Trim (LTFT). If the value is negative, it means the engine is running rich. This confirms the engine is wasting fuel, but it does not tell you why the engine is running rich. It could be sluggish oxygen sensors or some of the following causes.
 Inaccurate or Defective Coolant Sensor
The coolant sensor monitors the operating temperature of the coolant that is circulating inside the engine. If the sensor is defective and reads lower than normal, or always reads cold, the engine computer will keep operating in "open" loop - which means the fuel mixture remains rich. A richer fuel mixture is required while a cold engine is warming up to prevent it from stalling. But if the mixture remains rich once the engine is warm, it wastes the extra fuel and causes poor fuel economy.
The quickest way to check a coolant sensor is to plug in a scan tool and compare the coolant sensor reading with the inlet air temperature sensor reading when the engine is cold. But should show the same temperature reading. Then start the engine, and look for the coolant sensor to show a gradually increasing reading. If the engine eventually reaches 185 to 195 degrees ( once they warm up), the coolant sensor is probably okay.
If the coolant sensor reading does not change, or never reaches normal operating temperature, the problem could be the sensor or it could be a defective thermostat that is not closing when the engine is cold.
The next step would be to check the sensor's resistance reading with ah ohmmeter. If the reading does not match specifications for a given temperature, the sensor is bad and need to be replaced. If the sensor reads good, the problem is likely the engine thermostat.
Defective Engine Thermostat
The thermostat controls the operating temperature of the engine, and it helps the engine warm up quickly after a cold start. The thermostat is usually located in a housing where the upper radiator hose connects to the engine. When the engine is cold, the thermostat closes to block the flow of coolant. When a cold engine is started, the thermostat should remain closed until the coolant gets hot (around 185 to 195 degrees). If the thermostat does not close tightly or does not close at all, coolant will be circulating while the engine is trying to warm up. This will prevent the engine from warming up quickly, and it may never reach normal operating temperature. This can delay the powertrain control module from going into closed loop operation, causing a rich fuel mixture and poor fuel economy.
A quick check for this problem is to feel the upper radiator hose while the engine is warming up. If you feel coolant circulating through the hose following a cold start, the thermostat is probably stuck open. The fix is to replace the thermostat.
Engine Misfire
If an engine is misfiring for any reason, it will waste a LOT of fuel and result in poor fuel economy. Misfires can be caused by ignition problems such as worn or fouled spark plugs, bad plug wires, weak ignition coils or arcing between the plug wires or coil and ground. Misfires can also be caused by dirty or defective fuel injectors, vacuum leaks in the intake manifold, or low fuel pressure. Misfires can also be caused by loss of compression in one or more cylinders.
On 1996 and newer vehicles with OBD II, misfires should turn on the Check Engine Light and set a misfire code if the misfires are severe enough to cause an emissions problem. However, if the misfire rate is just below the threshold where a code must be set, you won't get a code or Check Engine light. If you have access to a factory scan tool or a professional level scan tool that can read something called "Mode $06" data, you can look at the actual misfire rates for each of the cylinders. from this, you can see if one or more cylinders are misfiring (even if they have not yet set a code).
If you do have a Check Engine Light and a cylinder specific misfire code (such as P0301 which would indicate cylinder #1 is misfiring), inspect the spark plug, plug wire (if used) and coil for that cylinder. If the ignition components appear to be working normally (no fouling, no shorting or arcing), the problem is likely a dirty or dead fuel injector.
If you get a P0300 "random misfire" code, the most likely cause is a lean fuel mixture due to an intake manifold vacuum leak, leaky EGR valve, or low fuel pressure.
Intake Manifold or EGR Valve Leak
A vacuum leak at the intake manifold gasket, in the manifold itself or any of its vacuum hose connections can lean out the air/fuel mixture and cause the engine to misfire and deliver poor fuel economy. Likewise, an EGR valve that does not close at idle, when the engine is cold or when it is not under load can allow exhaust to leak back into the intake manifold. This can also have a leaning effect and cause fuel-wasting misfires and poor fuel economy.
You need to check for vacuum leaks, and/or remove and clean the bottom of the EGR valve. Vacuum leaks can be found by spraying throttle cleaner along the edges of the intake manifold while the engine is idling. If the idle suddenly dhanges, it means some of the cleaner is being pulled into the engine through a leak. The fix usually requires replacing the intake manifold gasket, or the manifold itself if it is cracked. A cheaper fix is to apply a high temperature epoxy sealer to the crack and hope it seals the leak.
NOTE: It does not take much of a leak to upset the air/fuel ratio. Even a very small leak can cause problems. Professional technicians often use a device called a "smoke machine" to find small leaks. The machine generates a mineral vapor smoke, which is fed into the manifold (engine off). If there are any leaks, you will see the smoke seeping through the crack.

If no vacuum leaks are found, remove the EGR valve and check the underside of the valve and the port in the intake manifold for carbon deposits that may be preventing the valve from closing. Also, check the EGR valve's vacuum connections and solenoid to see if they are operating properly. There should be NO vacuum reaching the valve at idle or when the engine is cold.

Worn or Fouled Spark Plugs
Worn or fouled spark plugs will obviously cause fuel-wasting engine misfires. Platinum and Iridium plugs should last 100,000 miles, but short trip stop-and-go driving may cause the plugs to foul prematurely. An engine that is using oil can also foul out its spark plugs.
Remove and inspect the spark plugs. Clean the plugs if they are dirty, and regap to specifications, or better yet, just install a new set of spark plugs.
Dirty Fuel Injectors
Fuel varnish deposits can build up inside fuel injectors, preventing them from delivering their normal dose of fuel. This can cause a lean air/fuel mixture that results in lean misfires and wasted fuel.
Try adding a bottle of good quality (not the cheapest stuff) fuel injection cleaner to your fuel tank. It may take several tankfulls before any improvement is noticed. If that does not work, having the injectors professionally cleaned will often restore normal performance. If an injector is too badly clogged to be cleaned, or it is defective, you're looking at replacing one or more fuel injectors (which aren't cheap to replace!).
 Low Compression
If you are driving a high mileage vehicle (over 100,000 miles), you may be getting poor fuel economy because your engine does not have the compression it once had. As the miles add up, so does the wear on the piston rings and valves. This can result in a gradual loss of compression that reduces engine efficiency and fuel economy.
If you suspect low compression, do a compression test on the engine. If low, there is no easy fix other than an overhaul. There's no miracle cure in a can that will restore lost compression.
Wrong Oil Viscosity
Most late model passenger car engines today require a low viscosity 5W-20 or 5W-30 motor oil. Some even specify 0W-20. Such oils improve fuel economy, especially during cold weather when the oil tends to thicken. If you are using a heavier viscosity motor oil, it can reduce your fuel economy (maybe 5 to 10 percent depending on what you are using).
Dirty Air Filter
If your air filter is really dirty, it will interfere with normal engine breathing and hurt fuel economy. Remove and inspect the filter, and if it is dirty replace it with a new one.
 Clogged Converter or Exhaust Restriction
Any obstructions in the exhaust system will create power-robbing backpressure that also hurts fuel economy. You can inspect the outside of the system for any obvious signs of damage such as a crushed or crimped pipe. But internal problems such as a clogged converter or collapsed muffler or double walled pipe can't be seen from the outside.
You can check for an exhaust restriction by connecting a vacuum gauge to the intake manifold. At idle, the engine should show a high and steady vacuum reading (say 18 inches or higher). If the reading is less than this or it gradually drops, you have an exhaust restriction.
 Slipping Clutch or Transmission
If the clutch on a manual transmission is slipping, or the bands or torque converter lockup on an automatic transmission are slipping, some of the engine's power will be lost before it can reach the wheels. This can cause a noticeable drop in fuel economy -- and be VERY expensive to fix because it will require replacing the clutch or transmission.
 Low Tires
To achieve maximum fuel economy, your tires must be inflated to the recommended pressure for your vehicle and load. For most passenger car tires, that means 32 to 34 PSI. A low tire increases rolling resistance (and tire wear), and can result in a loss of 5 to 10 percent fuel economy. Check all four tires (when cold) with an accurate gauge, and inflate as needed to the recommended pressure.
 Dragging Brakes
A parking brake that is not fully releasing, or a brake caliper that is sticking can cause the brakes to drag and your engine to waste fuel. A quick check for this kind of problem is to park your vehicle on a slight incline, put the transmission in neutral, then release the brake pedal. If your car does not start to roll immediately, the brakes may be dragging.
 Too Much Junk in Your Trunk
More weight equals less fuel economy. It takes power to move mass, so if you are hauling a lot of unnecessary weight in the trunk or cargo area of your vehicle, you are not going to achieve maximum fuel economy.
 Poor Driving Habits
This is probably the most common problem and biggest fuel waster of all. Aggressive driving and jack rabbit starts flood the engine with extra fuel. Take it easy, as if you were driving with a raw egg under the gas pedal and you'll get the most miles per gallon from the fuel in your tank.